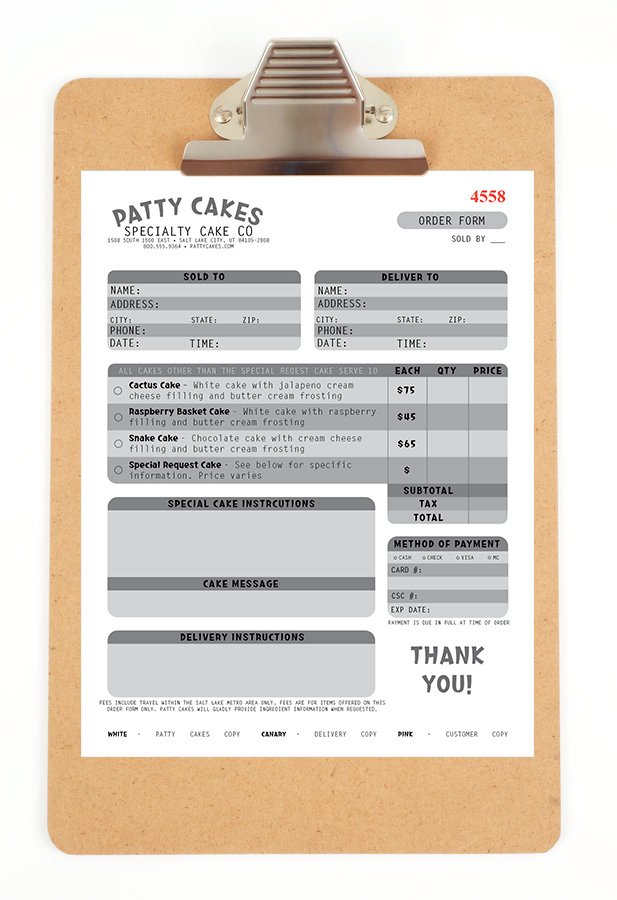
Form
This assignment was probably one of the harder ones for me to figure out, but in the end I ended up learning so much. We were given lots of information or organize into a fillable form. Figuring out how to get it all on the page in a organized and easy to follow manner was harder than I first thought, but it was rewarding to figure out.


Research & Brainstorming
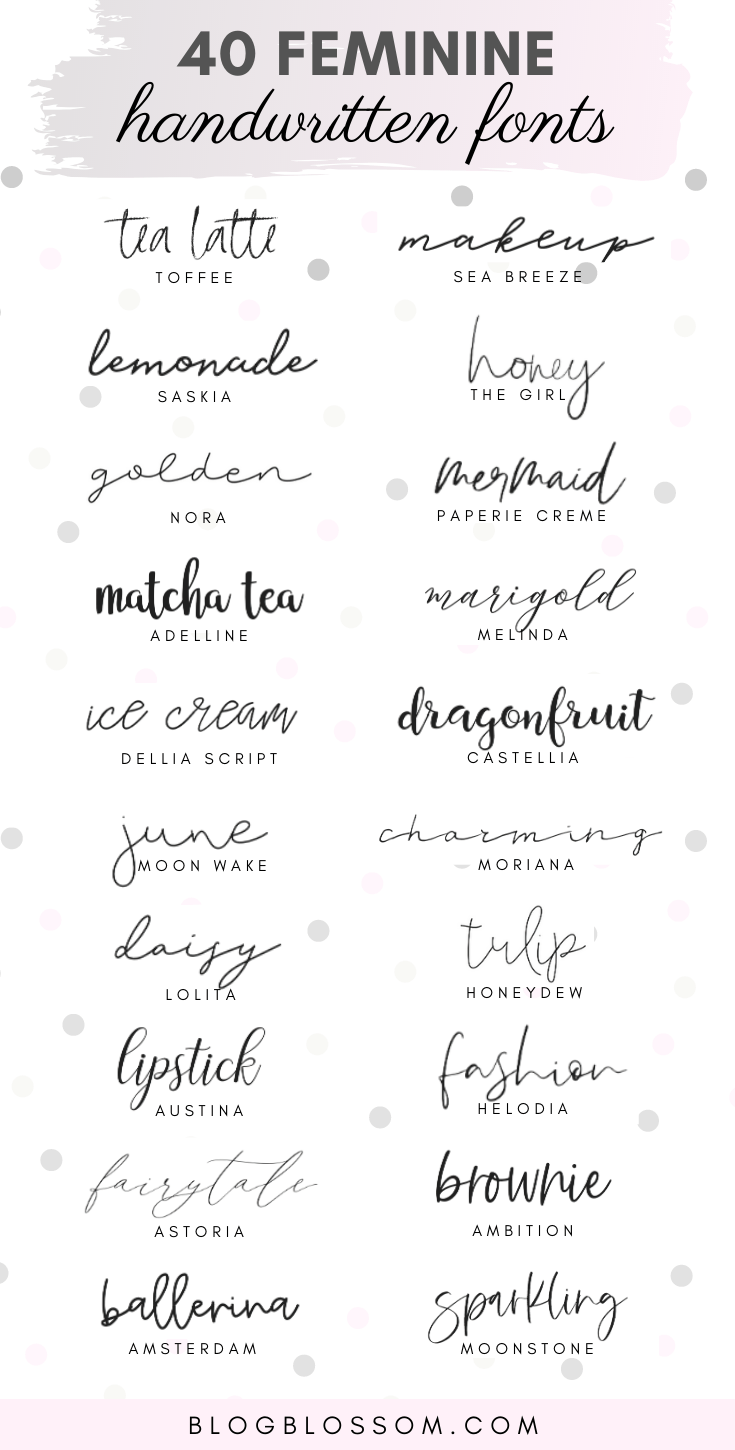
Of course, at the beginning of any project, brainstorming and research ae essential. It was especially important for this project because I didn’t really have a clear idea of what forms looked liked, or what made them visually appealing. I also wanted to look up different fonts that could be fun, and below is a little snippet of what I found


Sketches and Doodles
Once I had some ideas flowing, it was time to put them down on paper. I had fun figuring out what the logo type could be and tried out a few illustrations, even though I didn’t end up using them. I then started laying out the design, seeing out the layouts I had in mind actually worked. This is a very useful step and it helped me figure out what ideas I could go forward with and which ones I shouldn’t. I helped me get idea of measurements too.


3 Thumbnails
Once the sketches and doodles helped me figure out which ideas I wanted to go with, it was time to get it all down tightly. I worked on three different ideas and drew them out as small, tight thumbnails so I could really see how the spacing and layout would work and what looked best. This step was also helpful in making sure I had all the information needed in the layout from the beginning. I am learning how to tackle things on a smaller scale before going bigger, it really helps to get your ideas out quickly so you can know what is the best idea to go bigger with.


2 Intermediates
Judging by the thumbnails, I decided which layouts were the best and then made them full sized. This does make a big difference as you can see what everything looks full scale, and I mostly realized I could go smaller on a lot of things. Seeing them fully and having some other opinions really helped me know which design would be best to take into the final stages.


Final Hand Comp
After some debate on the intermediates, I then went forward onto the final hand drawn step, making some changes here and there to see which aspects I liked better. I attempted to make this final very clean and very tight, so I would know as closely as I could how it would look on the screen. This was a fun step to see all the pieces coming together and seeing that I really could get all the needed info in a nice layout.

B&W Computer Progressions
Once I decided on the final look by hand, it was time to get it onto the computer. This is always one of my favorite steps, I love taking what I’ve created by hand and replicating and improving it on the computer. It helped me make sure all the spacing was even throughout the whole design and it really helped cleaned everything up. I was able to try different things with each progression, seeing what worked and what didn’t so I could get the best finished product that I could. I am very happy with how this project turned out and feel liked I have learned a lot from it.


